If you are ordering UV Spot or Hotstamp Namecards, you will need to set up your design files appropriately.

Here's a guide on how you can do it yourself for the files setup, or if you like us to set up for you, please request via email at printmystuff@hotmail.com.
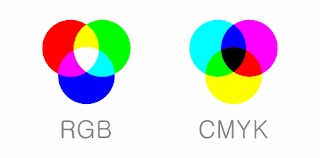
Step 1: CMYK Files
Convert your files to CYMK and sure your Graphic size is 90x54mm / 9x5.4cm.
Graphic in JPG or PSD format, atleast 300dpi for a better and clear resolution.
Step 2: Define Separation
For this step, we will create a black and white file for the separation. This can be done in many ways in your design program – by setting up new layers, defining a new layer or creating a separate file.
The areas for treatment (spot UV, hotstamping & etc.) will need to be defined in black ink, and areas for no treatment will be white. The black colour used must be CMYK Black only – with no grey colours, or other inks.
For the best outcome, and easiest process, we recommend creating the design in vector-format - such as in Adobe Illustrator (AI files).
K100 Black
CMYK: 0, 0, 0, 100
Step 3: Export Separation
We suggest double-checking the alignment of the separation to the original CMYK artwork (created in the previous step) before proceeding. Export each separation as a press-ready PDF file. Use the following naming conventions for your files:
| Type | File Name | Example (Front) |
| Spot UV | UV | Set1_Front_UV.pdf |
| Hotstamp GOLD | Hotstamp GOLD | Set1_Front_HOTSTAMP_GOLD.pdf |
| Hotstamp SILVER | Hotstamp SILVER | Set1_Front_HOTSTAMP_SILVER.pdf |
Each different treatment will need to be defined in a different separation file. For example, if you are setting up one order for Spot UV and Hotstamping, you will need UV and Hotstamping files. For multiple sets, use the same naming convention but change the set number as appropriate (ie. “Set2_Front.pdf”, "Set2_Back.pdf" etc.).
For this example, there are four files generated:
- Cats_Set1_Front.pdf
- Cats_Set1_Front_UV.pdf
- Cats_Set1_Back.pdf
- Cats_Set1_Back_UV.pdf


0 comments